Part 1 - Creating a New Project
Steps
-
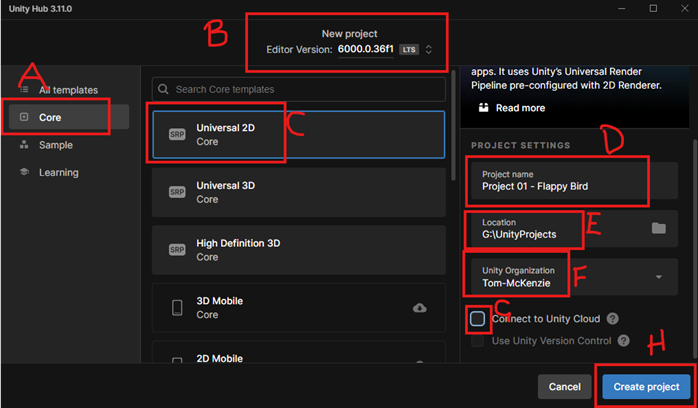
Open the Unity Hub and select
New Project. -
Check the settings before creating the project.
-
Make sure
Coreis selected. -
Make sure the
Editor Versionis6000.0...(the exact numbers after.0do not matter too much at this point). -
Select
Universal 2D - Core. -
Name the project
Project 01 - Flappy Bird. -
Make sure the location is NOT on OneDrive. If it defaulted to OneDrive, click the folder icon and ask your teacher for help saving it to a correct location.
-
Select an organisation.
-
Uncheck the box shown in class.
-
Once all of this is correct, click
Create Project.

Common Pitfall
If your project saves to OneDrive, you can run into missing files or sync issues. Always save to the class drive or a local folder your teacher approves.